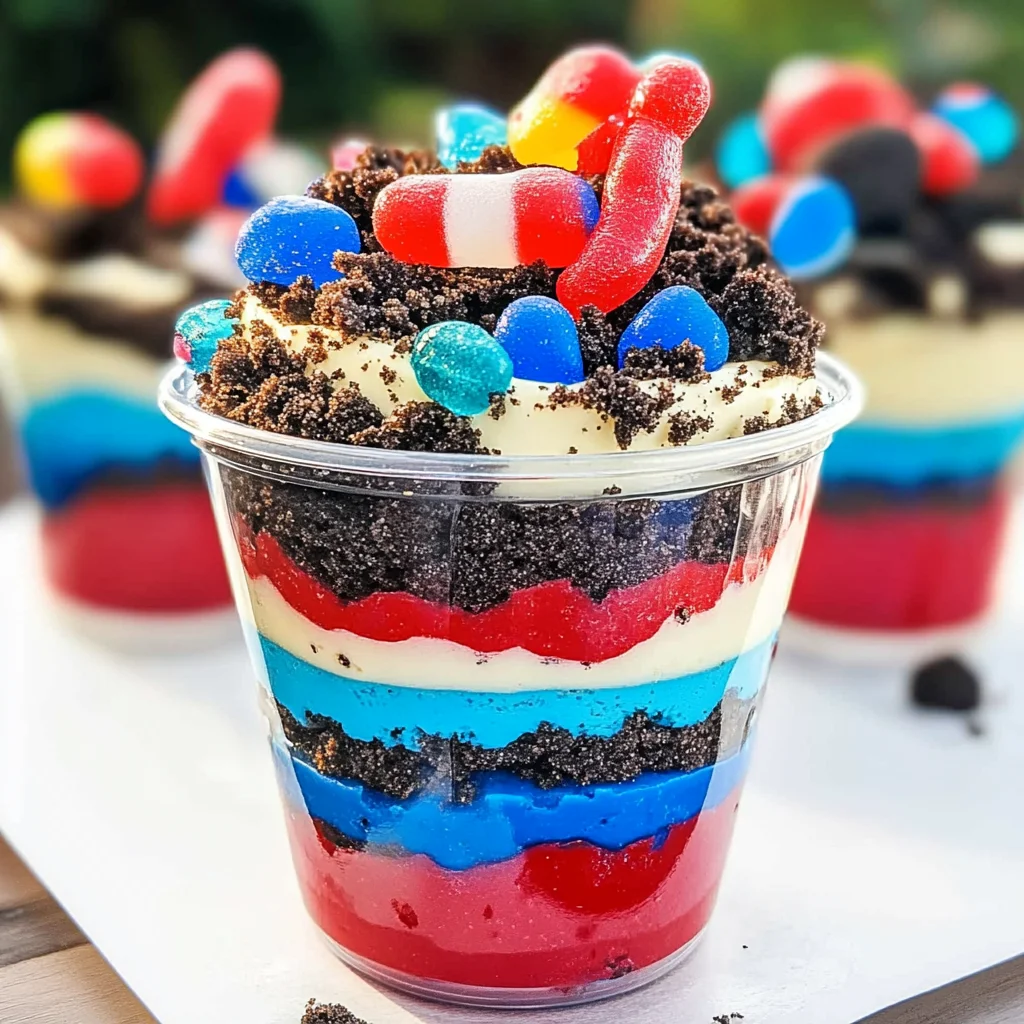
Red, White and Blue Dirt Cups
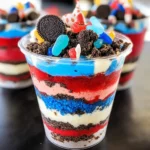
Easy no-bake Red, White and Blue Dirt Cups are the perfect summer dessert or treat for kids! These delightful cups feature layers of crushed Oreos, creamy pudding, and colorful toppings that celebrate festive occasions like the 4th of July. With their vibrant colors and fun presentation, they’re sure to be a hit at parties or family gatherings.
Why You’ll Love This Recipe
- Quick and Easy: This recipe takes only 10 minutes to prepare, making it ideal for busy days or last-minute gatherings.
- Kid-Friendly: Kids will love helping to assemble these colorful dirt cups, making for a fun kitchen activity.
- No-Bake Delight: No oven required! Perfect for hot summer days when you want something sweet without heating up your kitchen.
- Versatile Layers: Customize the layers with different colors or flavors of pudding to suit any celebration throughout the year.
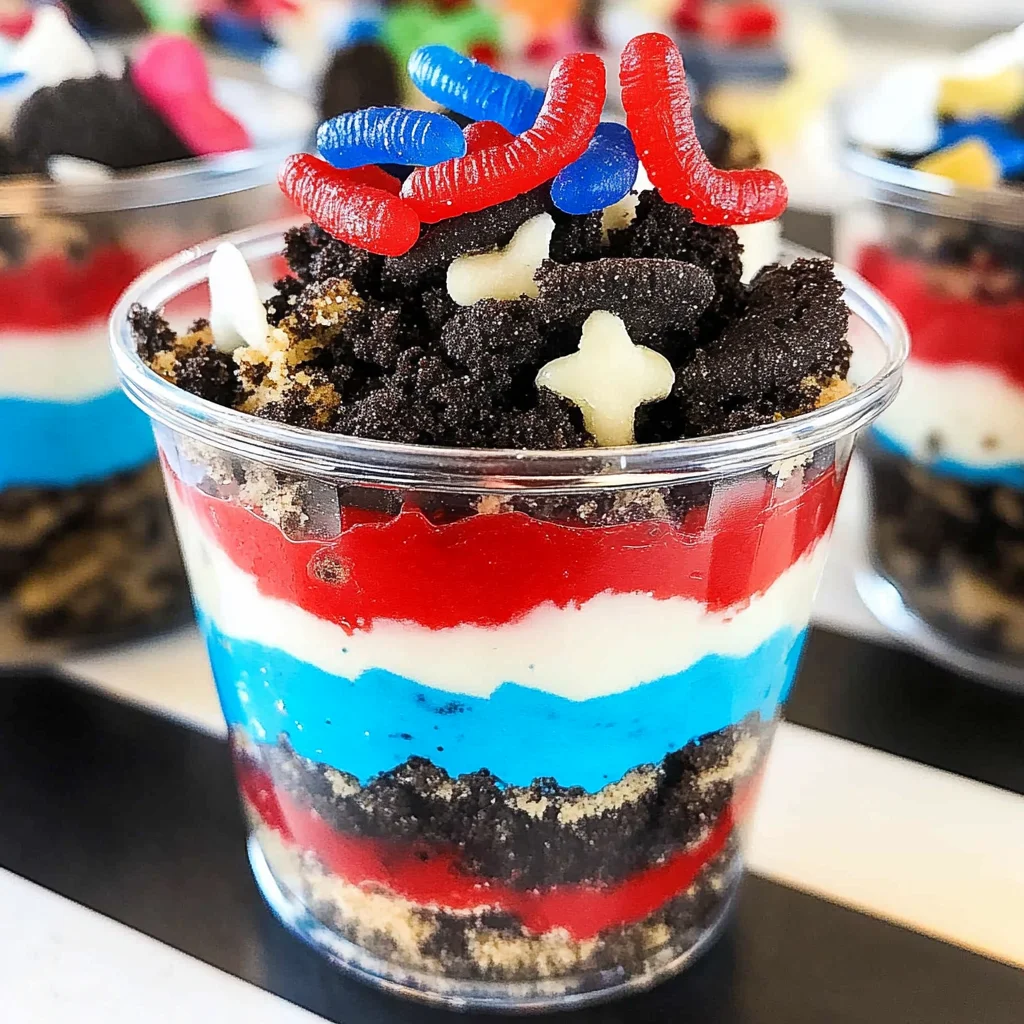
- Festive Presentation: The vibrant red, white, and blue layers look stunning in clear cups, making them perfect for showcasing at any event.
Tools and Preparation
To create your Red, White and Blue Dirt Cups, you’ll need some basic kitchen tools. These items will help streamline the process and ensure your dessert turns out perfectly layered.
Essential Tools and Equipment
- Mixing bowls
- Whisk
- Plastic cups
- Measuring spoons
Importance of Each Tool
- Mixing bowls: Essential for combining ingredients thoroughly, ensuring an even texture in your pudding.
- Whisk: Perfect for achieving a smooth consistency when blending pudding with milk.
- Plastic cups: Ideal for layering your ingredients so each layer is visible for an enticing presentation.
Ingredients
Here are the ingredients you will need to make delicious Red, White and Blue Dirt Cups:
For the Pudding Layers
- 2 boxes cheesecake pudding (3.4 ounces each)
- 4 cups milk
For the Oreo Layers
- 19 Oreo cookies (crushed)
For Color and Toppings
- ¼ teaspoon red gel food dye
- ¼ teaspoon blue gel food dye
- 8 red and blue pectin-based gummy candies
How to Make Red, White and Blue Dirt Cups
Step 1: Prepare the Pudding
- Place both boxes of pudding in a large mixing bowl.
- Add the milk to the bowl.
- Whisk until the pudding has thickened.
Step 2: Divide the Pudding
- Separate 1 cup of pudding into one bowl.
- Transfer 1 ½ cups of pudding into another bowl.
Step 3: Add Food Coloring
- In the bowl with 1 cup of pudding, add the blue gel dye.
- Mix until thoroughly combined.
- In the bowl with 1 ½ cups of pudding, add the red gel dye and stir until mixed well.
Step 4: Assemble Your Cups
- Line up your plastic cups on a flat surface.
- Place 1 tablespoon of crushed Oreos at the bottom of each cup and spread evenly.
- Add 2 tablespoons of blue pudding on top of the Oreos; gently spread it out evenly.
- Sprinkle another tablespoon of crushed Oreos on top, spreading evenly again.
- Next layer is 3 tablespoons of white pudding; spread evenly over the Oreos.
- Follow with 1 ½ tablespoons from the remaining white pudding; spread evenly once more.
- Finally, add a generous layer of red pudding—about 4 tablespoons—spreading it out evenly.
- Top off each cup with 2 tablespoons of crushed Oreos as decoration.
- Finish by adding two pectin-based gummy candies on top along with a small flag per cup.
Enjoy your festive Red, White and Blue Dirt Cups!
How to Serve Red, White and Blue Dirt Cups
Red, White and Blue Dirt Cups are a fun and festive dessert perfect for summer gatherings. You can serve them in various ways to enhance the celebration and delight your guests.
Individual Desserts
- Use clear plastic cups for a vibrant display of layers.
- Consider mason jars for a rustic touch that adds charm.
Party Platter
- Arrange multiple cups on a large serving tray.
- Garnish with fresh berries or mini flags for an eye-catching presentation.
Kids’ Table Treats
- Serve these cups at a kids’ table to keep little ones entertained.
- Let kids decorate their own cups with additional toppings like sprinkles or whipped cream.
Picnic Treats
- Pack the cups in a cooler for a fun picnic dessert.
- Ensure they are tightly sealed to prevent spills during transport.
How to Perfect Red, White and Blue Dirt Cups
To create the ultimate Red, White and Blue Dirt Cups, consider these helpful tips for achieving the best flavor and texture.
- Use cold milk: Starting with cold milk helps the pudding set up nicely and ensures a creamy texture.
- Crush Oreos finely: For better layering, crush the Oreos into smaller pieces so they blend well with the pudding.
- Layer carefully: Take your time layering each ingredient to achieve those beautiful stripes; use a spoon to spread layers evenly.
- Chill before serving: Allow the cups to chill in the refrigerator for at least an hour before serving. This helps improve the flavors and texture.
- Customize colors: Feel free to adjust the amount of food dye based on your desired vibrancy while maintaining balance between colors.
- Add garnishes: Top each cup with extra gummy candies or even fresh fruit for added flavor and decoration.
Best Side Dishes for Red, White and Blue Dirt Cups
Pairing your Red, White and Blue Dirt Cups with complementary side dishes can enhance your meal experience. Here are some tasty ideas that work well together.
- Fresh Fruit Salad: A mix of seasonal fruits provides a refreshing contrast to the sweetness of the dessert.
- Veggie Platter: Crisp vegetables served with hummus or ranch dip add crunch and balance out the meal’s sweetness.
- Mini Sandwiches: Variety of sandwiches (turkey, chicken salad) make excellent additions to any gathering, offering savory options alongside sweet treats.
- Cheese Board: A selection of cheeses paired with crackers creates an elegant touch that guests will love.
- Potato Salad: A classic dish that pairs nicely with sweet desserts, providing creamy textures and savory flavors.
- Grilled Corn on the Cob: Sweet corn adds summer vibes and complements outdoor celebrations beautifully.
- Pasta Salad: Light pasta salads can be refreshing alongside dessert while adding more substance to your meal.
- Brownie Bites: For chocolate lovers, these bite-sized treats will satisfy cravings without overshadowing your star dessert.
Common Mistakes to Avoid
Avoiding mistakes while making Red, White and Blue Dirt Cups can ensure a delightful dessert experience. Here are some common errors and how to steer clear of them:
-
Neglecting Measurements: Not measuring ingredients accurately can lead to inconsistent textures. Always use measuring cups and spoons for precise amounts.
-
Using Warm Milk: Adding warm milk to the pudding can affect its thickening process. Make sure your milk is cold before mixing it with the pudding powder.
-
Skipping Layers: Layering is crucial for both appearance and taste. Don’t rush through this step; take your time to create distinct layers for a beautiful presentation.
-
Overmixing Pudding: Mixing too vigorously can introduce air bubbles, leading to a less smooth texture. Stir gently until just combined to maintain creaminess.
-
Forgetting the Gummy Candies: These add a fun touch that kids love! Remember to include them on top before serving for that festive look.
Storage & Reheating Instructions
Refrigerator Storage
- Store in airtight containers for up to 3 days.
- Keep layers intact for freshness; avoid mixing before storing.
Freezing Red, White and Blue Dirt Cups
- These dirt cups are best enjoyed fresh but can be frozen for up to 1 month.
- Use freezer-safe containers; layering may get affected upon thawing.
Reheating Red, White and Blue Dirt Cups
- Oven: Not recommended as it will affect texture.
- Microwave: Heat briefly in short increments if needed; check frequently.
- Stovetop: Not applicable as these are served cold.
Frequently Asked Questions
If you’re curious about Red, White and Blue Dirt Cups, here are some commonly asked questions:
Can I use different flavors of pudding?
Absolutely! Feel free to experiment with chocolate or vanilla pudding instead of cheesecake for a unique twist.
How do I make this dessert gluten-free?
Use gluten-free cookies instead of traditional Oreos. There are many great options available in stores!
What’s the best way to layer the ingredients?
Start with cookies, followed by pudding layers. Use a spatula or spoon to create even layers for a beautiful presentation.
How long can I keep leftovers?
Leftovers can be stored in the refrigerator for up to 3 days. Just ensure they’re in an airtight container!
Final Thoughts
Red, White and Blue Dirt Cups are not only visually appealing but also easy to customize! You can adjust flavors or toppings based on your preferences. Try this recipe at your next gathering and watch it become a favorite among family and friends!
Red, White and Blue Dirt Cups
Indulge in the festive spirit with these vibrant Red, White and Blue Dirt Cups! Perfect for summer gatherings or holiday celebrations, these no-bake treats feature layers of creamy cheesecake pudding, crushed cookies, and colorful toppings. Quick to prepare in just 10 minutes, they are a fun and interactive dessert that kids will love helping to assemble. Ideal for hot days, you can avoid the oven while still enjoying a delightful sweet treat. Each cup is visually appealing with its striking red, white, and blue layers, making them a showstopper on any dessert table. Enjoy them at parties, picnics, or family gatherings and watch them disappear!
- Prep Time: 10 minutes
- Cook Time: 0 minutes
- Total Time: 10 minutes
- Yield: Serves approximately 6 cups 1x
- Category: Dessert
- Method: No-Bake
- Cuisine: American
Ingredients
- 2 boxes cheesecake pudding (3.4 ounces each)
- 4 cups cold milk
- 19 Oreo cookies (crushed)
- ¼ teaspoon red gel food dye
- ¼ teaspoon blue gel food dye
- 8 pectin-based gummy candies for decoration
Instructions
- In a large mixing bowl, whisk together both boxes of pudding and cold milk until thickened.
- Divide the mixture into two bowls: one with 1 cup of pudding and another with 1 ½ cups.
- Add blue gel dye to the first bowl and mix well; add red gel dye to the second bowl and stir until combined.
- Begin layering: place crushed Oreos at the bottom of clear plastic cups followed by layers of blue pudding, more Oreos, white pudding, remaining white pudding, red pudding, and finish with crushed Oreos on top.
- Garnish with pectin-based gummy candies before serving.
Nutrition
- Serving Size: 1 cup (150g)
- Calories: 280
- Sugar: 24g
- Sodium: 250mg
- Fat: 12g
- Saturated Fat: 6g
- Unsaturated Fat: 5g
- Trans Fat: 0g
- Carbohydrates: 39g
- Fiber: 2g
- Protein: 4g
- Cholesterol: 15mg