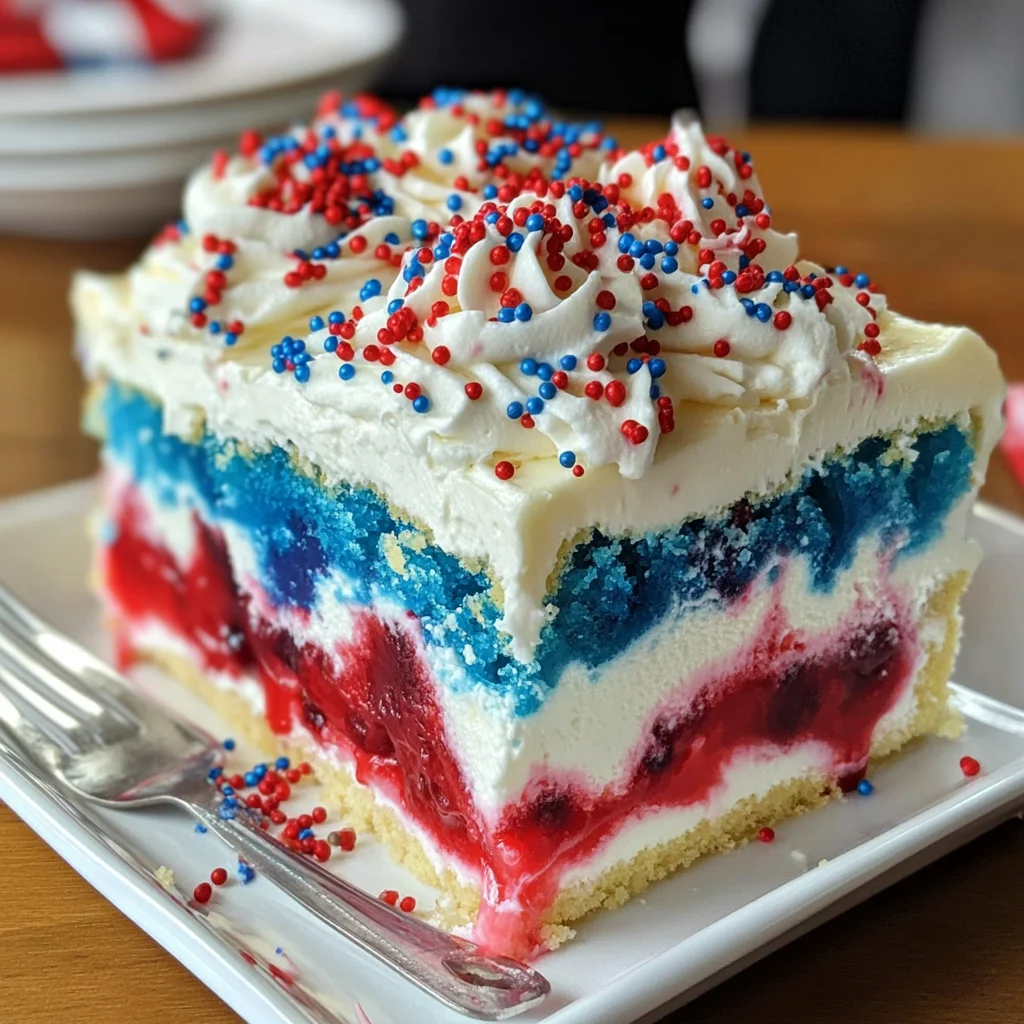
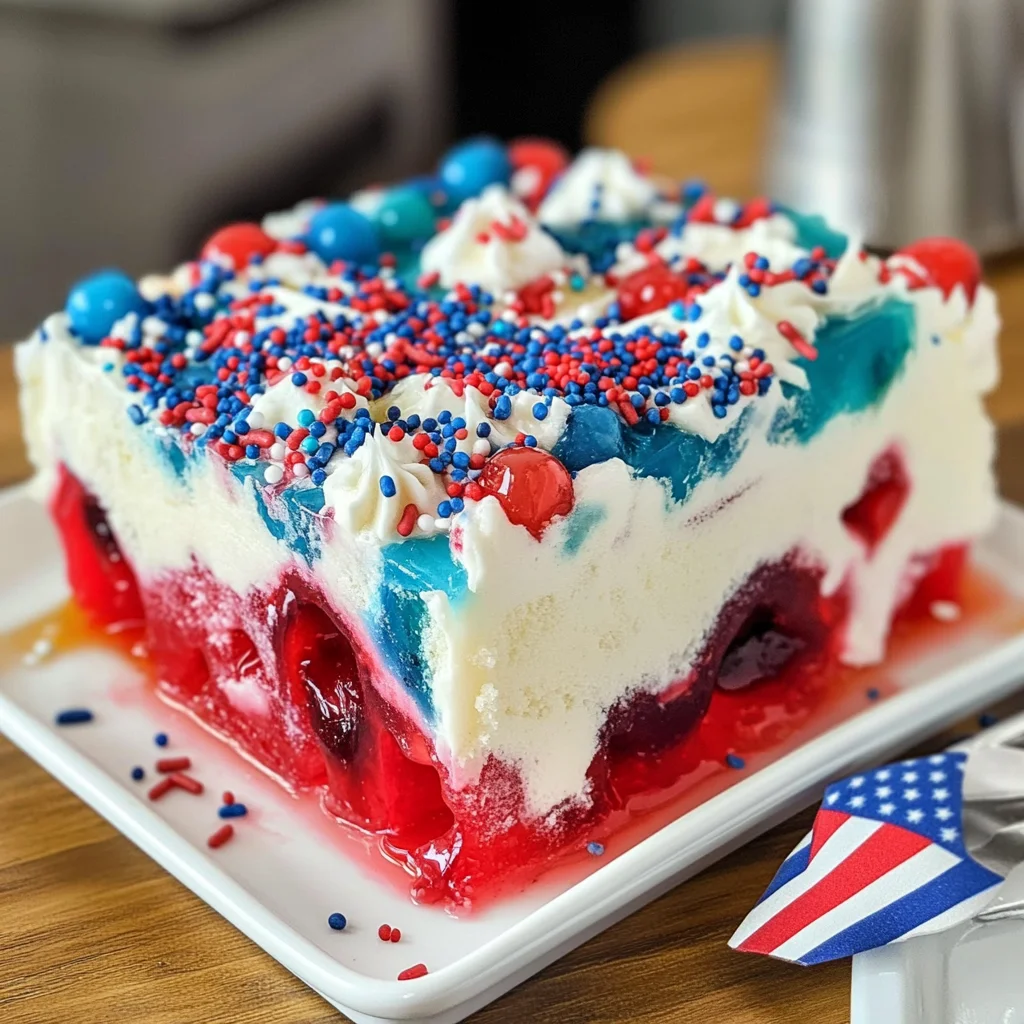
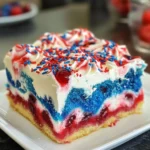
Red, White & Blue Poke Cake
The Red, White & Blue Poke Cake is a festive dessert that delights guests at any gathering. With its vibrant colors and refreshing flavors, this cake is perfect for celebrations like Independence Day, birthdays, or family reunions. The combination of rich cake and flavored gelatin creates a moist and exciting treat that stands out on any dessert table.
Why You’ll Love This Recipe
- Easy to Make: With simple ingredients and straightforward steps, this poke cake comes together quickly.
- Visually Stunning: The bright red and blue layers create an eye-catching dessert that’s sure to impress.
- Versatile for Occasions: Ideal for picnics, barbecues, or holiday gatherings—this cake fits any celebration.
- Deliciously Moist: The gelatin adds moisture and flavor, making each slice irresistible.
- Customizable Toppings: Feel free to add your favorite sprinkles or fruit for a personalized touch.
Tools and Preparation
To create your Red, White & Blue Poke Cake, you’ll need a few basic kitchen tools. Having the right equipment makes preparation easier and more enjoyable.
Essential Tools and Equipment
- Mixing bowl
- Baking pan (9×13 inch)
- Straw or wooden spoon handle
- Measuring cups
- Whisk or spoon
Importance of Each Tool
- Mixing bowl: A large bowl helps combine ingredients thoroughly without spilling.
- Baking pan: A 9×13 inch pan is perfect for even baking and easy serving.
- Straw or wooden spoon handle: These tools are essential for creating holes in the cake to absorb the Jell-o.
Ingredients
For the Cake
- One white cake mix + ingredients to prepare it
For the Jell-o Layers
- One 3 oz. box of Berry Blue Jell-o
- One 3 oz. box of Cherry Jell-o
For the Topping
- One 8 oz. tub of whipped topping (thawed)
- Red & blue food coloring (optional)
- Patriotic sprinkles or jimmies (optional)
How to Make Red, White & Blue Poke Cake
Step 1: Prepare the Cake
- Prepare the white cake mix according to package directions.
- Once baked, allow the cake to cool completely in the pan.
Step 2: Poke Holes in the Cake
- Using a straw or the handle of a wooden spoon, poke holes all over the surface of the cooled cake.
Step 3: Prepare the Jell-o
- In separate bowls, prepare each box of Jell-o using 1 cup of boiling water and 1/2 cup of cold water (note this is less cold water than what is stated on package instructions).
Step 4: Add Blue Jell-o
- Carefully pour or spoon the blue Jell-o over one portion of the cake.
- Ensure that some liquid seeps into each hole.
Step 5: Add Red Jell-o
- Repeat with the red Jell-o, pouring it over the remaining part of the cake.
- Again, make sure it fills in all holes.
Step 6: Refrigerate
- Cover the cake with plastic wrap and refrigerate for at least 3-4 hours or overnight so that the Jell-o can set within the cake.
Step 7: Top with Whipped Topping
- Once set, remove from refrigerator and spread whipped topping over the entire surface of the cake.
Step 8: Decorate
- Just before serving, use a toothpick dipped in food coloring to swirl red and blue colors into the whipped topping if desired.
- Sprinkle on patriotic sprinkles or jimmies for extra flair.
Step 9: Slice and Serve
- Cut into squares and serve chilled!
- Remember to refrigerate any leftover cake after serving.
Enjoy this delightful Red, White & Blue Poke Cake at your next event!
How to Serve Red, White & Blue Poke Cake
Serving Red, White & Blue Poke Cake is all about enhancing its festive appearance and flavor. Here are some fun suggestions to make your cake the star of any gathering.
For a Festive Gathering
- Add Fresh Berries: Top the cake with fresh strawberries and blueberries for a vibrant touch.
- Serve with Ice Cream: Pair slices of cake with a scoop of vanilla or berry-flavored ice cream for a delightful contrast.
As a Picnic Treat
- Individually Wrapped Slices: Cut the cake into squares and wrap them in plastic for easy transport.
- Pack with Lemonade: Serve alongside chilled lemonade for a refreshing summer treat.
For a Birthday Celebration
- Personalized Toppings: Use themed candles or custom sprinkles to match the birthday person’s favorite colors.
- Layered Presentation: Create a layered dessert by serving pieces of poke cake in clear cups, topped with whipped cream and extra Jell-o.
How to Perfect Red, White & Blue Poke Cake
Achieving the perfect Red, White & Blue Poke Cake requires attention to detail. Below are some tips to elevate your baking game.
- Use Room Temperature Ingredients: This helps the cake mix blend smoothly for an even texture.
- Cool Completely: Ensure the cake is fully cooled before poking holes; this prevents melting of the Jell-o.
- Pour Slowly: When adding Jell-o, pour it slowly to ensure it seeps into every hole without overflowing.
- Refrigerate Overnight: Allowing the cake to chill overnight enhances its flavor and sets the Jell-o perfectly.
- Decorate Just Before Serving: To keep toppings fresh and appealing, decorate right before you present it.
Best Side Dishes for Red, White & Blue Poke Cake
Pairing side dishes with your Red, White & Blue Poke Cake can enhance your dessert experience. Here are some complementary options that work well.
- Grilled Chicken Salad: A light salad with grilled chicken, mixed greens, and vinaigrette balances the sweetness of the cake.
- Vegetable Platter: Serve assorted fresh vegetables with hummus for a healthy crunch that contrasts nicely with dessert.
- Coleslaw: A tangy coleslaw adds crunch and brightness that pairs well with the rich poke cake.
- Fruit Salad: A refreshing fruit salad can cleanse the palate after enjoying the sweet layers of cake.
- Corn on the Cob: Grilled or boiled corn on the cob offers a savory element that complements sweet desserts.
- Potato Wedges: Crispy potato wedges seasoned with herbs provide a hearty contrast to your light dessert.
Common Mistakes to Avoid
When making Red, White & Blue Poke Cake, it’s easy to make a few common mistakes that can affect the outcome. Here are some tips to ensure your cake turns out perfectly.
- Not cooling the cake completely: If you don’t let the cake cool fully before poking holes, the Jell-o can seep out instead of setting within the cake. Always allow enough cooling time.
- Using too much cold water for Jell-o: Following the package instructions too closely can lead to Jell-o that doesn’t set well in the cake. Use only 1/2 cup of cold water with each box of Jell-o.
- Pouring Jell-o too quickly: If you pour the Jell-o too fast, it may not fill all the holes properly. Take your time to carefully spoon and pour it into each hole.
- Skipping the refrigeration step: Not allowing the cake to chill long enough will result in a runny texture. Make sure to refrigerate for at least 3-4 hours or overnight for best results.
- Not customizing toppings: Failing to add personal touches like food coloring swirls or sprinkles can make your cake less festive. Get creative with your decorations for a vibrant presentation.
Storage & Reheating Instructions
Refrigerator Storage
-
- Duration: Store in the refrigerator for up to 3-5 days.
-
- Containers: Use an airtight container or cover with plastic wrap to keep it fresh.
Freezing Red, White & Blue Poke Cake
-
- Duration: Can be frozen for up to 2 months.
-
- Containers: Wrap slices tightly in plastic wrap and then in aluminum foil, or use a freezer-safe container.
Reheating Red, White & Blue Poke Cake
- Oven: Preheat oven to 350°F (175°C). Cover with foil and heat for about 10-15 minutes until warmed through.
- Microwave: Place a slice on a microwave-safe plate and heat on medium power for about 20-30 seconds.
- Stovetop: Heat in a skillet over low heat for about 5 minutes, covered, until warmed through.
Frequently Asked Questions
Here are some common questions about making and enjoying Red, White & Blue Poke Cake.
How do I make Red, White & Blue Poke Cake more festive?
You can add star-shaped sprinkles or edible glitter on top of your cake for an extra festive touch!
Can I use other flavors of Jell-o?
Absolutely! Feel free to experiment with different flavors like lemon or orange for unique variations of Red, White & Blue Poke Cake.
How long does it take to prepare Red, White & Blue Poke Cake?
The total time is around 55 minutes, including baking and cooling. Remember to account for chilling time as well!
What can I substitute for whipped topping?
You can use homemade whipped cream made from heavy cream if you prefer a more natural ingredient.
Is there a way to make this recipe gluten-free?
Yes! You can use a gluten-free white cake mix instead of regular white cake mix for those who need gluten-free options.
Final Thoughts
Red, White & Blue Poke Cake is not only visually appealing but also deliciously refreshing. It’s perfect for gatherings and celebrations where you want a fun dessert that everyone will love. Plus, feel free to customize it with different flavors and toppings to suit your taste preferences!
Red, White & Blue Poke Cake
The Red, White & Blue Poke Cake is a vibrant and festive dessert that brings joy to any celebration. With its striking layers of red and blue Jell-o and a fluffy whipped topping, this cake is not only visually appealing but also refreshingly delicious. Perfect for summer gatherings, birthdays, or family reunions, it features simple ingredients and easy steps that make it accessible for bakers of all skill levels. This delightful treat will surely be the star of your dessert table, impressing guests with its colorful presentation and moist texture.
- Prep Time: 15 minutes
- Cook Time: 30 minutes
- Total Time: 45 minutes
- Yield: Approximately 12 servings 1x
- Category: Dessert
- Method: Baking
- Cuisine: American
Ingredients
- One white cake mix (plus ingredients per package instructions)
- One 3 oz. box of Berry Blue Jell-o
- One 3 oz. box of Cherry Jell-o
- One 8 oz. tub of whipped topping (thawed)
- Optional: red & blue food coloring, patriotic sprinkles
Instructions
- Prepare the white cake mix according to the package instructions and bake in a 9×13 inch pan.
- Allow the cake to cool completely before poking holes all over its surface using a straw or wooden spoon handle.
- In separate bowls, prepare each flavored Jell-o by mixing with boiling water and less cold water than the package suggests.
- Pour the Berry Blue Jell-o over one half of the cake, ensuring it seeps into holes, then repeat with Cherry Jell-o on the other half.
- Cover and refrigerate for at least 3-4 hours or overnight.
- Once set, spread thawed whipped topping over the cake and decorate with food coloring swirls or sprinkles just before serving.
Nutrition
- Serving Size: 1 slice (90g)
- Calories: 210
- Sugar: 20g
- Sodium: 180mg
- Fat: 6g
- Saturated Fat: 3g
- Unsaturated Fat: 2g
- Trans Fat: 0g
- Carbohydrates: 36g
- Fiber: <1g
- Protein: 2g
- Cholesterol: 30mg